OH heck. I’m late in posting this blog.
Hope you’re all having an awesome week and are staying a bit
warmer than I’ve been. We’ve been seeing consistent 40F days and rain and wind
and I’m pretty much over it at this point.
Because of the weather constraints, I’ve been having a hard
time getting to any of the outside projects that have been piling up. Just part
of the uglies of living on a homestead; there are some things that can be done
when it gets to this time of year, but after getting home from a full day,
there’s very little daylight left to get outside projects done.
So this week I did something a little different, which you
can check out here.
Cooking and baking always warm me up on a cold day, so that’s the
hope for this dreary, damp week.
Bread takes longer, so we’re going to start on that.
This recipe is basically the Betty Crocker white bread
recipe, but I like to substitute the bleached flour with White Whole Wheat Flour.
It keeps the bread the same light, fluffy consistency as bleached flour, but it
has just a little bit more of a wheat bread bite to it.
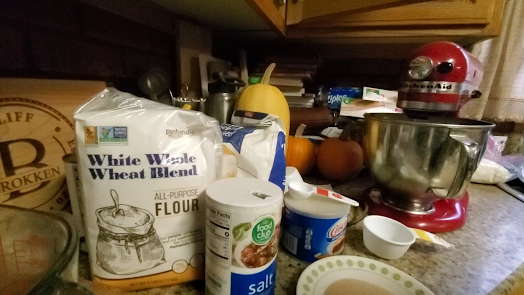
Ingredients
- 6-7 cups flour
- 2 packages active dry yeast (or 4 & 1/2 tsp yeast)
- 3 tbsp sugar
- 1 tbsp salt
- 2 tbsp shortening
- 1 & 1/4 cup warm water
Step 1
Mix 3 & 1/2 cups flour, the salt, sugar, shortening and
yeast in a bowl. Slowly add very warm water and mix.
*Tips from a former baker (me!)
- Wait to measure the warm water until you need it. I mix all the dry ingredients first, test the temperature of the water, then measure and add it. This way it doesn’t cool down while I’m measuring and adding everything else and I don’t have to reheat or remeasure my water.
- Be sure not to pour your yeast directly onto the salt. I’ve noticed from previous experience that this can slow down the rising process and cause everything to take longer. I normally add my dry ingredients in this order: salt, flour, sugar, yeast. Your yeast feeds on the sugar, so adding them closer to each other will help them do what they need to do.
Step 2
Slowly mix in the remaining flour, one cup at a time, until
the dough springs back when you gently press with a finger and doesn’t stick
easily to your skin. I’ve found this recipe works best with 6 to 6 & 1/2
cups flour.
Step 3
Now it’s time to knead your dough.
You can either do it by hand on a lightly floured surface,
or in your mixer, whichever you prefer. I like letting my mixer do the work so
I can clean up after the other steps. This process takes about 10 minutes if
you’re mixing by hand, and I’ve had great results mixing for only 6 to 7
minutes at medium speed in the mixer.

Step 4
Now we let the dough rise until it’s roughly doubled in size.
This takes anywhere from 40 to 60 minutes, depends on how warm the room is you
have your dough in. A lot of recipes will suggest you let the dough rise in a lightly
greased bowl, it’s always worked fine for me to let it rise directly in the bowl
I mixed it in. I just lay a damp paper towel over the top and set a timer.
This is also a great time to grease your pans and have them
ready for later.

Step 5
When your dough has doubled, it’s time to roll it out and
shape it into two lovely loaves.
I just eyeball everything at this point. I split the big
ball into two relatively equal sized balls. I believe the original recipe calls
for each dough ball into 9 by 13 inch rectangles, but I quit measuring ages
ago. As long as it’s close to those dimensions, it’s good enough for me. Then
you roll it up nice and gently, pinch the ends and fold them under, and place
the loaf in the greased pan.

Step 6
It’s the final rise step!
The loaves only need to rise for about 30 minutes at this
point, just tuck them under that damp towel again and set your timer.
When you’ve got about 5 minutes left on the clock, move the oven rack to one of the lower rungs and preheat your oven to 425F.

Step 7
Now we bake!
The loaves go into the oven for 20-25 minutes. Once the time
is done, take them out and let them cool on a rack. Most recipes say to let them
cool completely before slicing, but I know how impossible that is, and I generally
wait about 10-15 minutes before cutting into my loaves, basically so I don’t
burn my hands as badly.
*More tips from a former baker
- If you’re not sure whether your loaves are fully cooked, one way to tell is to flick, tap, or knock a knuckle against the top of the crust. If it sounds hollow, your bread is fully baked.
Now that the bread is done and cooling, I’m going to get the
chicken in the oven.

Ingredients
- 1 full chicken, organs removed
- Seasonings of your choice
- 10 or 12 inch cast iron pan
Step 1
While the bread was on its last rise step, I rinsed, dried
and seasoned my bird.
For the seasonings, I found a delicious mix by accident, simply
by throwing together all the leftovers of several pre-mixed seasoning containers
I had sitting around.
I used about 2 tbsp of a pre-mixed Italian seasoning mix, 2
tbsp of McCormick Grill Mates Montreal Chicken, 1/2tsp salt, 1/4tsp pepper, and
1/2tsp garlic powder.
Make sure to spread those seasonings all over the skin of
your chicken, I even season the bottom, and inside the cavity. This will help the
flavor seep into the meat instead of just staying on the skin.
Place your seasoned bird in your pan, making sure that no
parts are hanging over the lip and could drip into your oven. I can normally
make a 10 inch cast iron pan work for this, but sometimes the birds are just a
pinch too big and I have to step it up to a 12 inch pan.

Step 2
This is the easy part. We bake it.
Place your pan into an oven preheated to 350F and set a timer
for 45 minutes.
It normally takes around 60 for an average bird you would purchase
from the store, so just be sure to take the internal temperature in the thick
parts of the meat to ensure it’s getting cooked through completely.
If 45 minutes isn’t enough, bake it for 5-10 minute
intervals until the internal temperature has reached 165F.
The best place to test your temperature is in the thick part
of the thigh, making sure you’re not touching the bone.

And that’s it! Let your chicken rest for at least 15 minutes
before cutting, to make sure you don’t lose all the moisture when making that
first cut.
Enjoy your chicken sandwiches, I hope you all have a freaking
awesome rest of your week, and I’ll see you next Monday!
-Alyx


